These days I'm interested in taking a more "homemade" approach to things. I saw this post on Rouxbe.com's blog and decided this was something I had to try.
Pronounced Nyoki, these fresh pillows of pasta are fun and easy to make. These can be made ahead of time and frozen for up to 2 months.
Prep Time: 1-1/2 hours
Cook Time: 5 minutes
Total Time: About 2 hours
Servings: 4
 |
| Cut and rice the potatoes, making sure they don't pile up in one spot |
2 medium Yukon Gold potatoes
1/2 teaspoon kosher salt
2 tsp water
1 cup all-purpose flour
2 large egg yolks
1/4 tsp kosher salt
1/4 tsp freshly-grated nutmeg
1/8 tsp white pepper
4 tbsp unsalted butter
8 fresh sage leaves
1 large pinch kosher salt
1/4 cup Parmigiano-Reggiano (or to taste)
 |
| Sprinkle potatoes with a good amount of flour and aerate with a bench scraper |
- Preheat oven to 400 degrees Fahrenheit. Place the potatoes onto a sheet of foil, add the salt and water and wrap. Bake for approximately 40 minutes or until cooked through.
- Peel the potatoes while they are still hot, cut and rice the potatoes, making sure they don't pile up in one spot. Let the potatoes cool completely before proceeding.
 |
| Continue to cut and gently lift the dough |
- To make the dough, sprinkle the potatoes with a good amount of flour. Aerate the potatoes with a bench scraper and then add the salt, nutmeg, and white pepper.
- Break up the egg yolks and pour them over the potatoes. Cover the surface again with more flour. Continue to cut and gently lift the dough.
- Test the dough by gently squeezing it in your hand. It shouldn't stick. Add a bit more flour, if needed.
 |
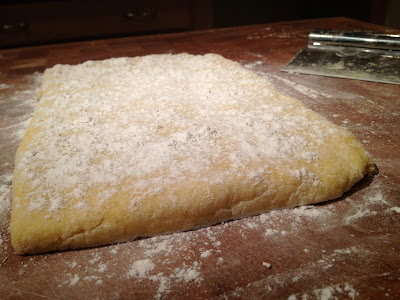
| Sprinkle with flour and let the dough rest for about 5 to 10 minutes |
- Once done, shape the dough into a rectangle and fold it a few times, using your fingertips to bring it together. Flatten the dough out until it is about the thickness of your finger. Sprinkle with flour and let the dough rest for about 5 to 10 minutes.
 |
| Cut strips of dough, about the width of your finger |
- Cut strips of dough, about the width of your finger, and sprinkle the strips with flour so they don't stick to each other.
 |
| Cut into 3/4" pieces and separate them slightly and flour them well |
- Roll out each strip and cut the ropes into 3/4" pieces. Separate them slightly and flour them well so that they don't stick together.
 |
| Shape the dough with a gnocchi paddle |
- You can leave the gnocchi as is or you can shape them with a gnocchi paddle. Shaping the dough makes them look better and also creates a little pocket to capture the sauce.
 |
| Shaped gnocchi |
- To cook the gnocchi, bring a pot of cold water to a simmer and add the salt.
- Gently place the gnocchi into the simmering water, stirring now and again, to make sure nothing is sticking. Gnocchi only takes a couple of minutes to cook, so as soon as they float to the top, lift them out.
- Separately melt butter in a sauce pan over medium-low heat. Add sage leaves and salt. Toss gnocchi with sage butter and plate. Sprinkle with Parmigiano-Reggiano and serve.
 |
| Gnocchi with warm sage butter sauce |
Here's a link to the must see full video recipe that this post was stolen from.


